To save Credits and time, Short Range Scanners need to be built as efficient as possible.
Note that because of the randomness of planet discovery, there is no one right way to layout your scanners. How you explore your system is entirely a matter of personal preference. You should base your scanner layout on how your own system turns out. Just remember to think about the rising cost of later scans vs the hydrogen expense to make shipments between your planets. This means that after your first scanner, you should be always looking to place your scanners to expose 3 sectors.
Here are a number of ways to build the Scanners with pictures :
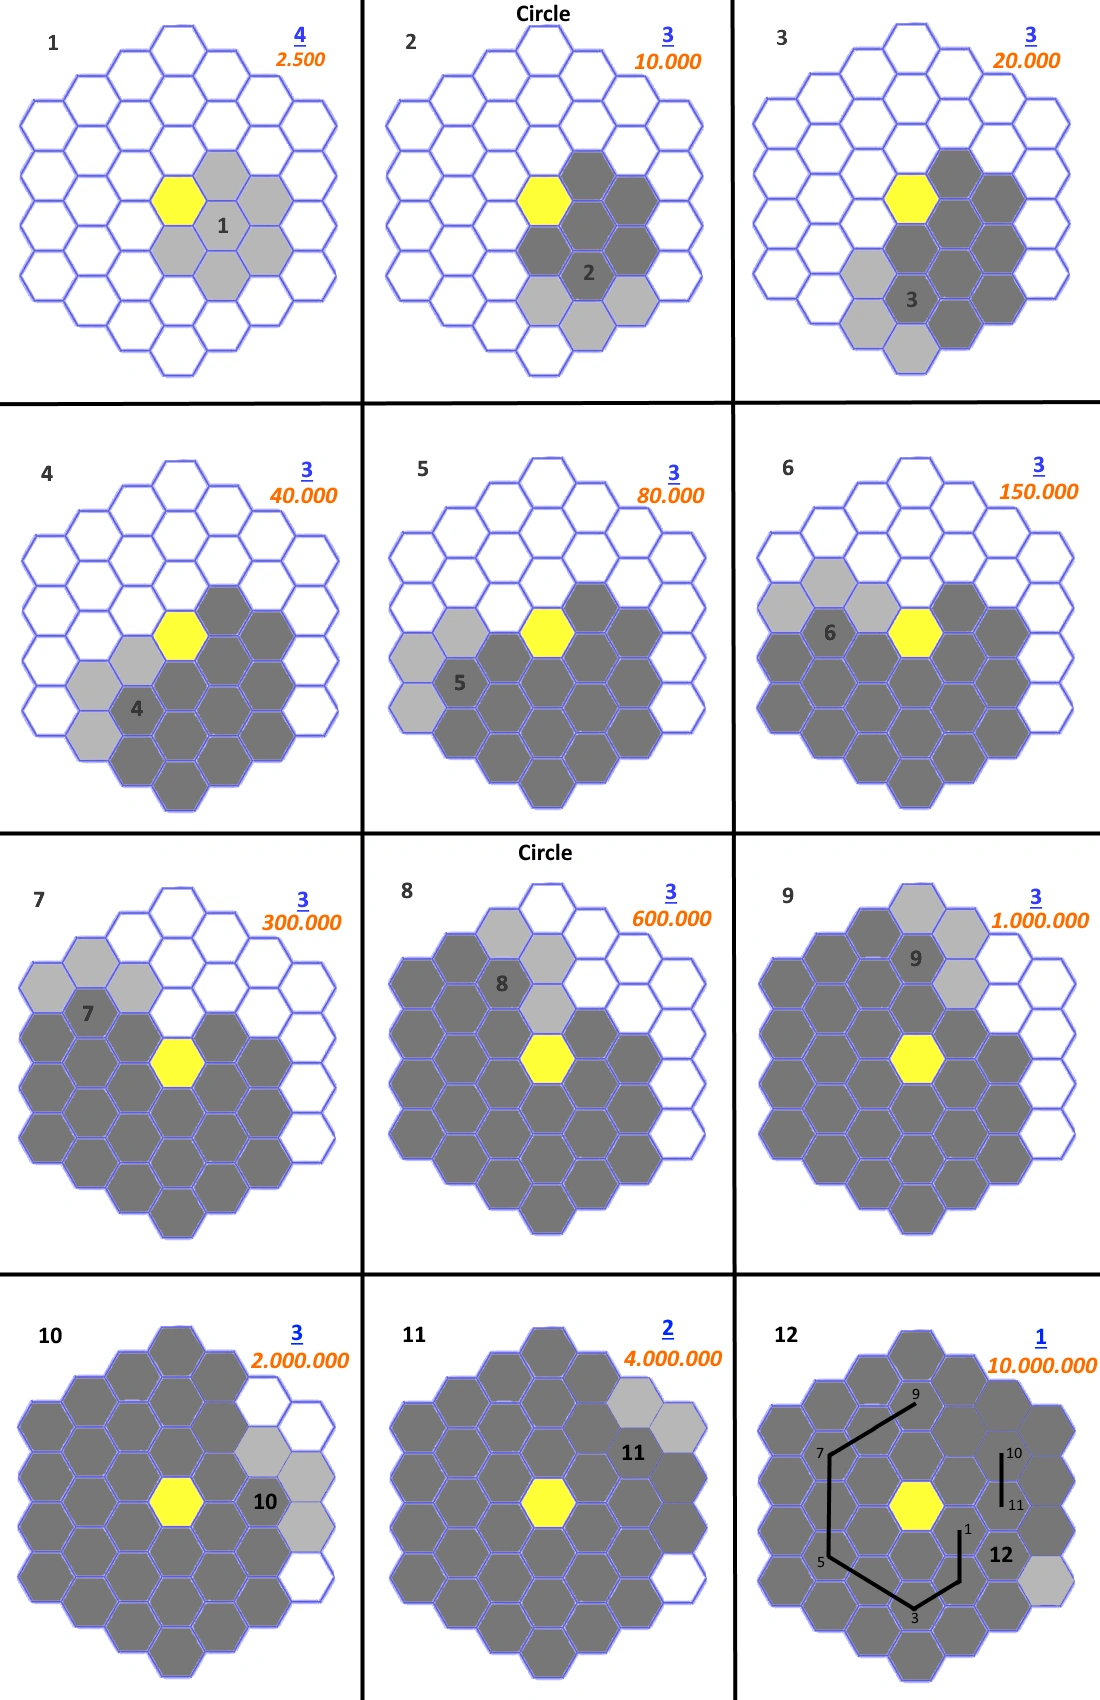
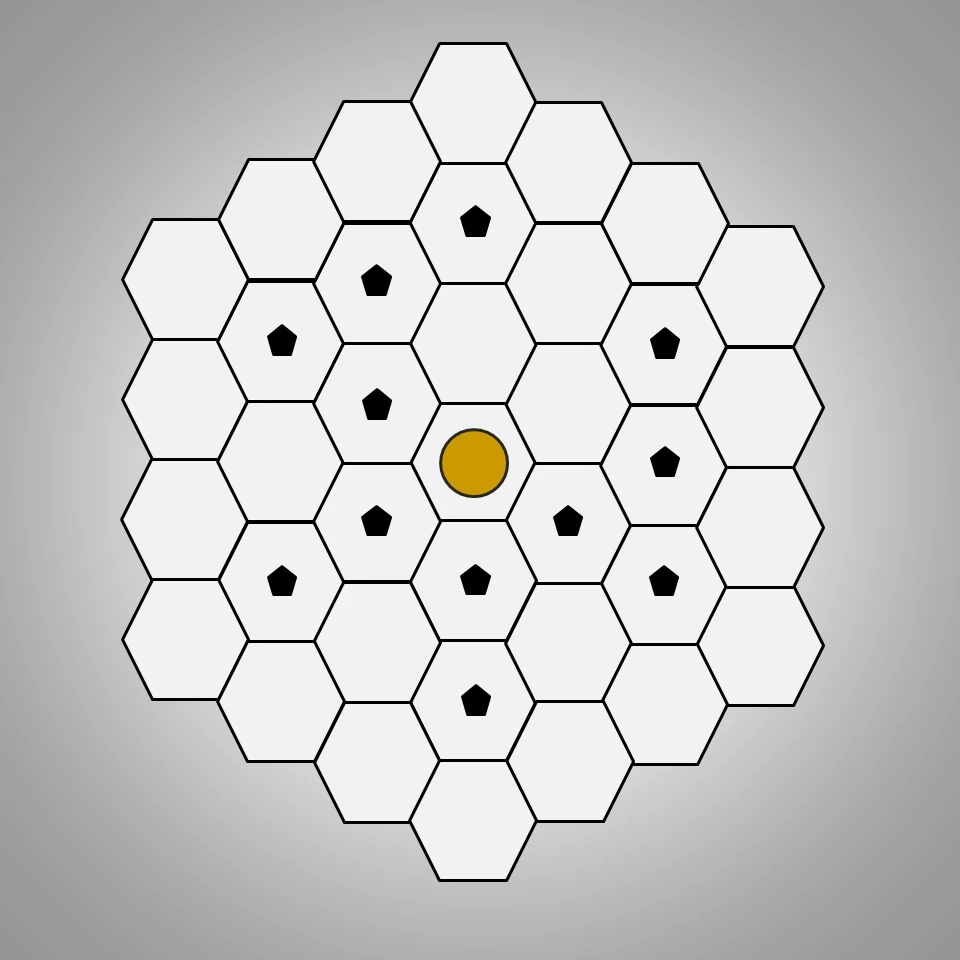
Layout Explanation
- Yellow Center = Sun
- Dark Gray Areas = Areas that you have access to
- Light Gray Areas = Areas that you can scan after building the scanner
- White Areas = You have no access to those areas
- Top left number = Number of Scanner to build
- Top right number = Amount of Scans needed
- Top right orange number = Cost per Scanner and Scan (not all numbers confirmed)
The "Circle" Technique[]
Circle Technique
Advantages :
- Save build times
- Save credits
Disadvantages :
- Not a compact build in mid game might cost more hydrogen to travel
While other plans (Semi-Circle) may be as efficient, no other plan can be more efficient.
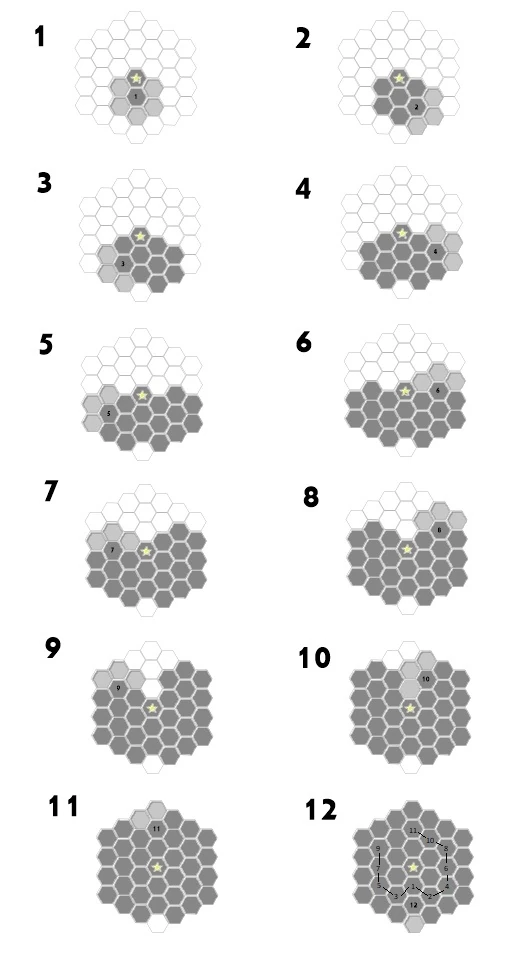
The "Semi-Circle" Technique[]
A variation of the Circle that allows you to customize every step of your growing empires expansion while still spending the least amount of build time and credits possible.
Scanners 2+3, 4+5, 6+7, and 8+9 are all inter-changeable if following the base pattern shown in the example. Scanner 10 can also be flipped to the inner-most sector revealed by 9 in the example as well.
Alternately, a single "arm" can be followed such as going 2,4,6,8,10,11 and then back to 3,5,7,9 or as far as suits you before going the other direction and you can always alternate arms as you see fit.
Going .....7,8,10,9,11... will eliminate the large unexplored section in the center that would require you to travel around when shipping but warp lanes can also alleviate this.
Since there are scans where you'll know in advance whether you'll get a planet or empty sector# you can have two scanners "active" and switch between them to have a little more control on placement.
Going beyond placement 11 with one arm will alter the basic pattern essentially starting you on the circle technique. If you do be sure to at least use the circle techniques placement 10 (same as semi circle 2/3) or you will end up with 2 scans for your 10th, 11th and 12th scanners. Which will ultimately cost 8,000,000 more credits.
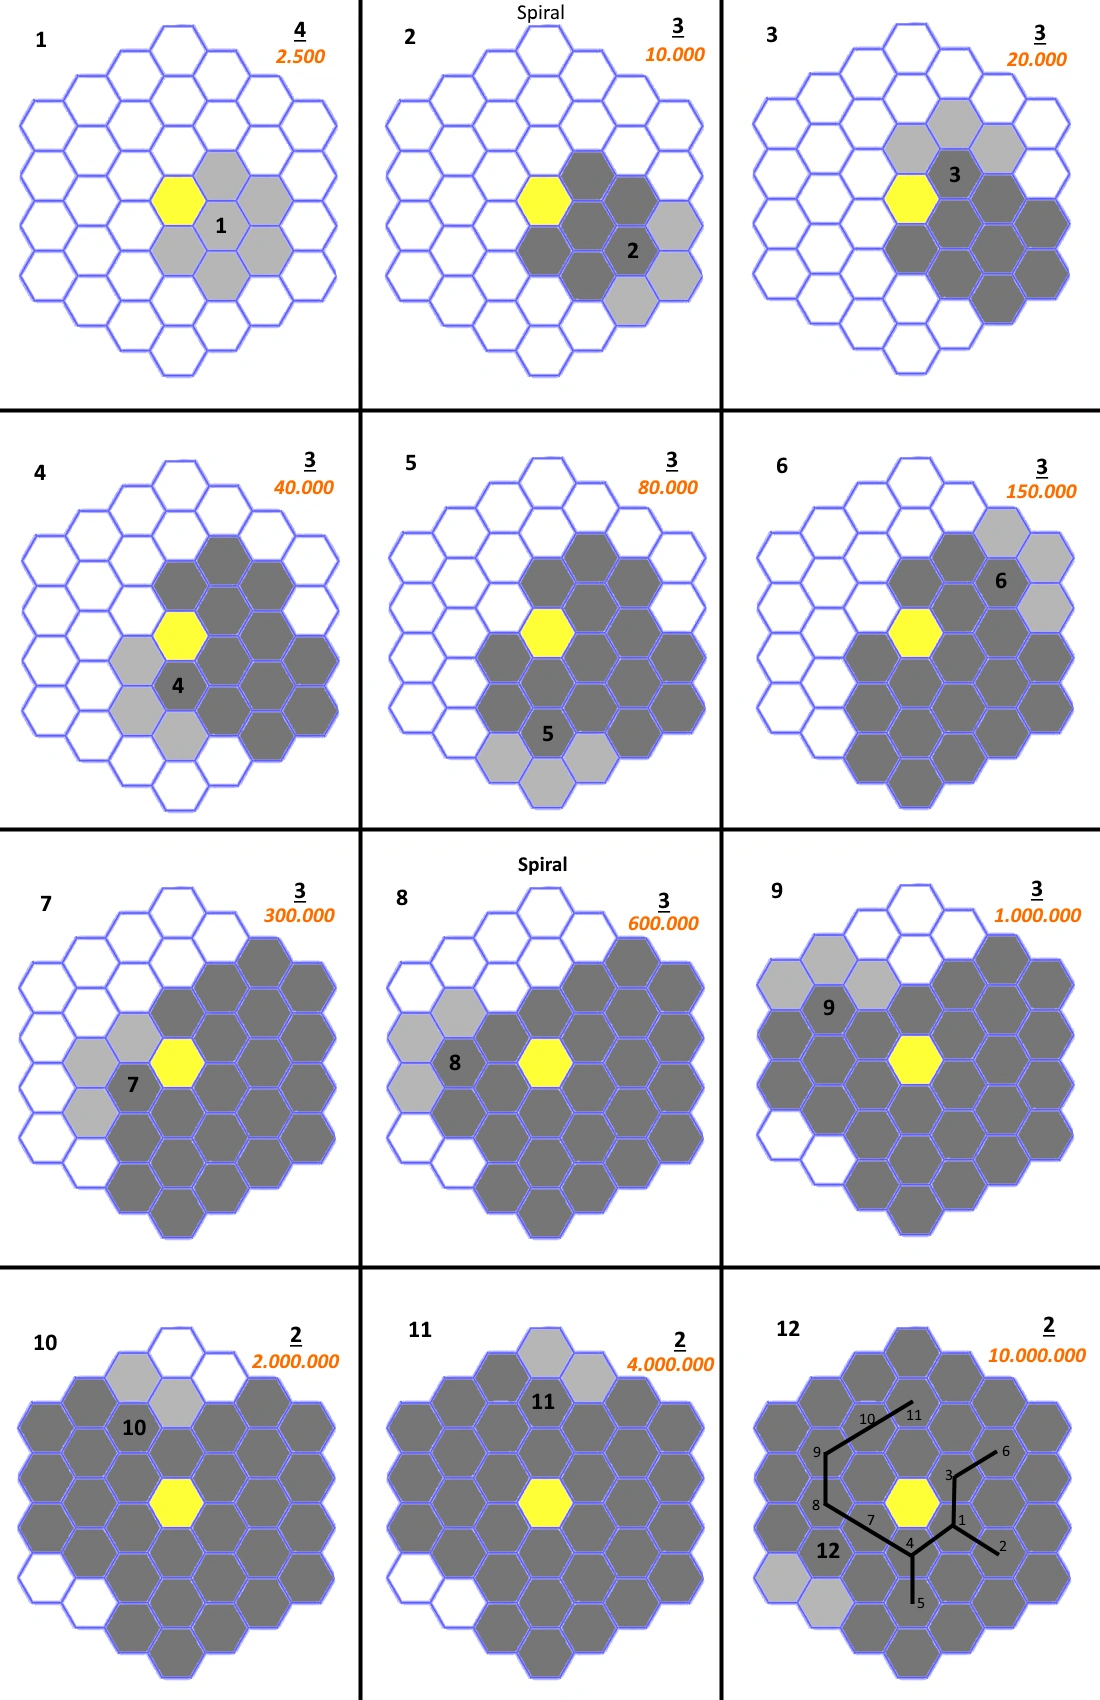
The "Spiral" Technique[]
Spiral Technique
Advantages :
- Compact build in mid game
- More choices of the order of scanner placement (1-6 can be placed in different orders).
- Flexible for recovering from initial scanner placements: ex. first sector can be 1, 3 or 4
- Save hydrogen travel costs
Disadvantages :
- Costs 8,000,000 more credits than Circle/Semi-Circle in the last 4 scans.
- Takes a bit more time to complete (in the last 4 scans).
"Spoke and Hub"[]

Spoke and Hub Technique
A technique that focuses on "Long-Term growth as the priority" originally posted on https://www.reddit.com/r/HadesStar/comments/6qiqh9/ultimate_scanner_placement_and_quickguide_to/
Advantages :
- Many choices of the order of scanner placement
- Provides slightly shorter shipping distances mid game if scanner order is inefficient (All blue scanners placed first).
Disadvantages :
- Blue Scanner 5 is a "short" scans of 2 sectors and will need to be between the 5th and 9th scanner placed. This will cost more credits and time.
- Blue Scanner 6 is also a "short" scan of 1 sector and will need to be between the 6th and 11th scanner placed. This will cost more credits and time.
- Focusing on inner sectors first will result in more of the later, richer planets in the outer ring.
You can start this technique the same as Spiral by building one "half" plus scanner 7 first (for 4 Blue and 3 Red). This delays the "short scan" reducing long term cost and time, but offers no benefits over switching to Spiral.
Instead of placing the 6th blue scanner on the inner ring, place it on one of the bordering middle rings. This will uncover the same Red sector as the inner placement as well as an outer ring sector, reducing the cost of that sector.
"The Claw"[]
Design Goals:
• Provide a large amount of player choice for scanner locations at any given time.

• Maximum 12 scanners with no 1 sector scans
The Hub-and-Spoke scanning method is designed to ensure that all planets from the initial series of scans are close to the star for easier shipping. The problems with Hub-and-Spoke are that all later (and larger) planets are on the outer ring of the system meaning that end-game shipping will be tedious. Additionally Hub-and-Spoke requires a 1 sector scanner (scanner 6) which results in an expensive total scanning cost.
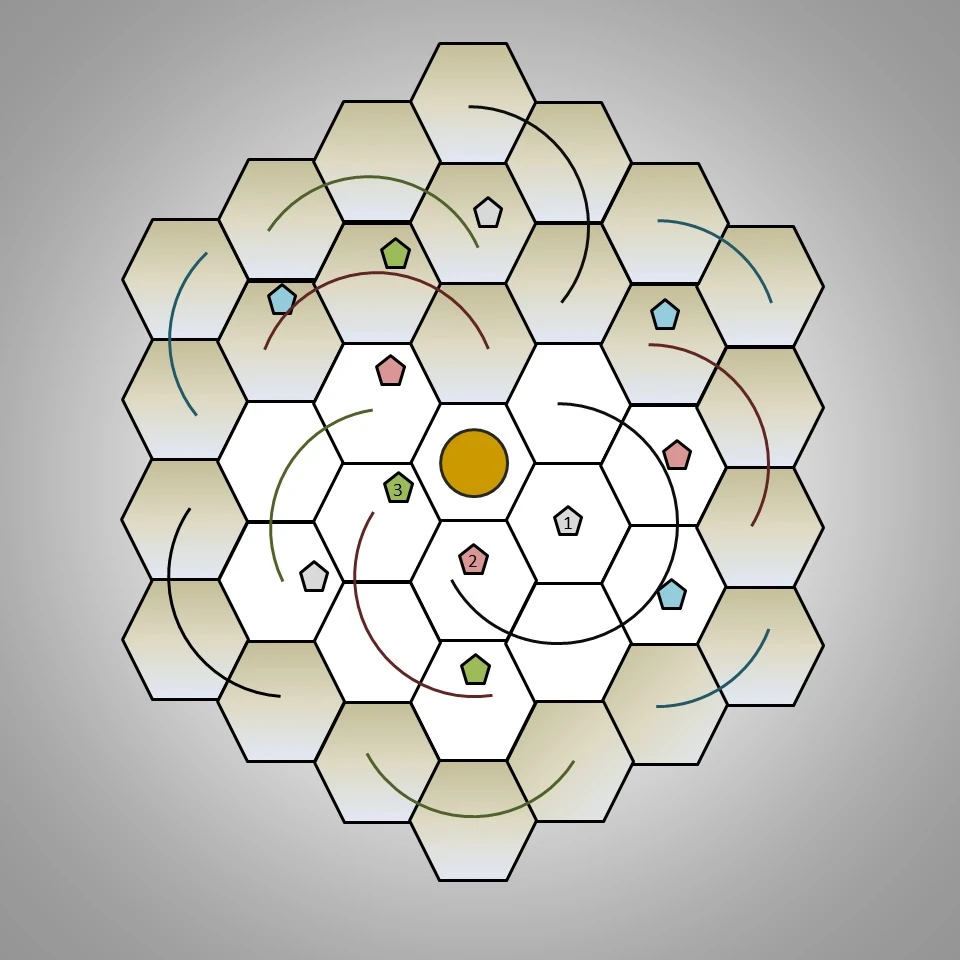

The Claw is a modification to Hub-and-Spoke that attempts to resolve the above issues as well as incorporate the new strategy of building multiple scanners at once in order to ‘weigh’ RNG in the players favor. The Claw only has three numbered scans, the first three locations right next to the star. At the completion of these three scans there are a total of 5 perspective locations for a player to build their next scanner. The player then has the choice of where to build their scanners in order to ensure that the next planet in sequence is located where they want it. (Note: One location of the initial reveal is a 2 sector scanner) For example, a player may elect to place the medium desert planet far away from their system and then not colonize it in order to ensure that higher yield planets would be located more centrally and/or in advantageous positions. This scanning method requires three scanners to be two sector scans, meaning that it is more expensive than the ‘circle’ or ‘semi-circle’ patterns by 8 million.
Note that many players use this method already or something similar to it as it is similar to the ‘spiral’ scanning method.
Multi-Scanner Method[]
The Multi-scanner method is a new strategy that developed after the confirmation that planets are placed via scan number and not via scanner. For Example: The Medium Fire Planet will always be in the 13th, 14th, or 15th, sector scanned no matter how many scanners were built so far or their locations. So a player could elect to build the 4th scanner (which would scan the 13th, 14th, or 15th sector) and scan until they discover the medium fire planet, they would then know each successive scan (up-to-15) would be an empty sector. The player then has the option of building another scanner and then performing additional scans, placing empty sectors in positions where they definitely do not want planets. This method may be used with any scanning pattern as long as the player has the option of building multiple scanners at once.
When planning out scans using this method it is easiest to divide sectors into two categories: "Possible chance of planet" or "Guaranteed empty" and work from there. Have about 2x as many 'possible' sectors as 'empty' sectors.
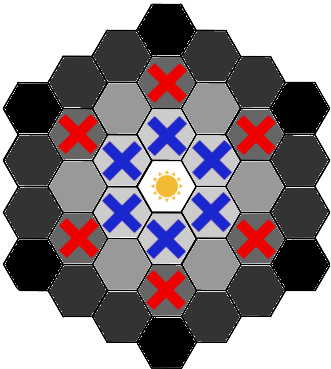
Recovery Plans[]
Many players only consider scanner placement after they have placed their first few scanners. In some cases, a player may not be able to fit their existing placements into one of the more efficient plans above. However there are a few common traits in those plans that can be used to create efficient recovery plans:
- Do not place scanners on the outer ring. Scanners on the outer ring will only reveal a single sector or require another outer ring scan.
- Seen in other plans, but clearest in the "Spoke and Hub" technique, to get to the 6 outer ring corner (Black) sectors, you must place scanners on the 6 middle ring corner (Red X) sectors. These 6 sectors cover all the other sectors, so getting to them should be the focus of a good recovery plan.